Showing posts with label projects. Show all posts

Saturday, October 2, 2010

Less than 70 degrees

I think this might be the first day since Spring that the temperature didn't go above 70°. Normally I hate to see the warm weather go, but more and more I'm finding that I rather like the month of October: gorgeously colored leaves, apple picking, pumpkin carving, and, of course, knitting. I sadly neglected it during the abnormally hot and sticky Summer but now I'm wishing I sucked it up and at least finished a hat.

Since I have little to show, here's a failed attempt from last year:
(Frogged) Lucky 7 Hat


Modifications:
Crown rounds 1 and 13: changed k2tog to ssk to match the direction of the cables.

Detailed project notes:
2009.12.06 CO 84 sts on size 5s; worked 10 rounds; tried it on; it fit ok, but stretched too much leaving non-wind-resistant gaps; ripped it out.
2009.12.07 CO 96 sts on size 5s (enough for 8 cables). As expected, this is too loose. Need to figure out a happy medium that still allows the ribbing to flow into the cables.
2009.12.08 Trust the pattern. Back down to 84 sts and size 7 needles. Yeah, typically ribbing is bigger that most else, but the sts seem even enough in the pattern photo and it fits ok. Plus, I’m impatient and really want to make this now with this yarn. After 18 rows of ribbing, I finally finished the left overs from Evangeline and began the second skein.
2009.12.11 Finished up through the noggin; on to the crown.
2009.12.13 Finished all but the last row of the crown, put in a lifeline and pulled tight, tried it on, and didn’t like it. I guess either my row gauge is way off or I have a bigger head than I realized because withOUT folding up the ribbing it fits. I want to fold it up for extra warmth. Ripped out the crown and will try adding another cable repeat.
2009.12.14 FROGGED I’m not happy with the fit so I’m stopping now because I know I’m not going to wear it. It’s short and tight. After following the pattern as written, if I fold the ribbing up I’d lose ear coverage. If I fold it up and pull it down, it’s tight and stretched and won’t be any sort of wind resistant in the upper half. It’s not a bad pattern and I like the hat, it’s just not what I was looking for right now.

I checked out others' projects and they seemed to run into sizing issues, too. It's a nice hat and I'll probably try it again someday (maybe with chunkier yarn?), but it's not going to be warm like I wanted. Of course, neither is the lacy beret currently on my needles, but that's another post...

Sunday, May 2, 2010

Joining the Ranks of Sock Knitters

I finished my first sock!

In progress photo:
WIP - Anastasia Socks

I love it and I loved knitting it. The Koigu Painter's Palette Premium Merino hand-painted yarn is a bit, well, more colorful than I'd usually wear, but all the different colors and frequent changes made it much easier to see what I was doing on the short row toe and heel.

I started out with a different pattern (Leyburn) but didn't want to be so worried about tension on my first pair, plus I wanted a bit of openness. I found Anastasia after much Ravelry hunting. I could've saved myself a lot of time just by looking more into Leyburn's creator: pepperknit.com designed both!


Rav notes/timeline:

2010.03.21 I’m getting pretty good at making sock toes. Maybe this will be the project where I finally make it to the heel…
2010.03.24 Halfway through the foot. This is a much better pattern for this yarn than Leyburn.
2010.03.25 Took a break from knitting for a bit to weave in the toe end. I didn’t skim the sts yet, just wove it a bit. Must remember to finish this before washing.
2010.03.26 7.25”, 4th spiral is at the end of the needles, beginning the heel with a purl row. Stop wrapping when 10 sts are live (6 wrapped sts on either end).
2010.03.27 Scratch all that. They don’t fit. I measured the ball of the foot as suggested in Socks from the Toe Up, did the -10% thing, etc. and it fits the ball fine. Where instep meets ankle, however, is about a full inch larger (8.5” vs. 7.5”) and the pattern gets very stretched and distorted trying to accommodate that. (Don’t think that changes my view on that awesome book--it was, after all, my fault for not measuring that in the first place.)
Option A: Rip out completely and start over with more sts. Currently, the toe fits (actually it’s a little big on the pinky side; apparently I have a big, big toe but that’s an issue for another sock) and the ball fits, and I don’t think either would fit if I upped the number of sts from the start.
Option B: Switch to a larger needle. I don’t currently own any other size dpn until going up to size 5. I already checked LYS availability for a 1.5 circular to switch to magic loop and found that the closest one is already closed for the weekend. I’m not willing to wait. Plus, I like my gauge as-is and think another size up will be too loose.
Option C: Do some math and increase somewhere in the middle. Then exactly repeat everything for the second sock. The most difficult to execute is, as usual, my favored option (wonder if I do that on purpose…).
2010.03.29 Finally got around to ripping out the heel and half of the foot. Slowly working my way back up, increasing 4 sts in one row (one per spiral, including future leg spirals) so right now I have 8 sts between spirals. Might do one more increase round like this.
Increase Round: To be worked on round 14 of my chart (maybe I should upload that…). At the end of round 13, M1 st on the sole. Round 14 instep: k2tog, yo, K1, M1, K5, (k2tog, yo) twice, K5, M1, K1, k2tog, yo. Round 14 sole: begin with a M1 and then k around as usual.
2010.04.02 Made it to the heel. Stopped at about 10 rows after the 3rd spiral, with 5 St sts at the beginning of each instep needle before the eyelets, and 4 pairs of eyelets completed for the 5th spiral. It fits much better this time.
2010.04.02 (later) Finished the heel. It still fits much better. Picked up 2 sts between the heel and the instep to close the gap, began knitting the instep in pattern and realized I messed up somewhere because there aren’t the right number of sts between the spirals. I’ve been tinking any mistakes made so far, but in this case it would mean undoing the heel to get to the rest of the instep. Or I can drop sts in lace work. Either way, the first order of business is finding out where it happened. This oughta be fun…
2010.04.03 Tried to fix the problem without ripping out, I really did. I can fix knit sts no problem, k2tog wasn’t hard to figure out, but even with techknitter’s guide to moving increases, I can’t figure out the moving yo’s and mixing those with the k2togs. I spent more time trying to figure it out than I did making the heel in the first place, plus the yarn’s starting to fuzz and stick together, so the heel is no more. Now my problem is with picking up a row of sts, which I surprisingly had no trouble with the last time I ripped out. I’m hoping a bit of sleep will help before attempting this again.
2010.04.04 Fixed the extra eyelets, re-knit the heel, started up the leg, and forgot to start making spirals on the back. At least I don’t have to rip back as far this time.
2010.04.08 Now that the heel’s done and spirals started, it’s moving along quite swimmingly. I’ve got a couple inches up the leg and seem to have enough yarn to get a good ways up the calf, if not all the way to the knee! May want to make an increase round or two before getting that high, though.
2010.04.10 Ok so maybe thinking I could make them knee-highs was a bit excessive, lol. I think I might take a break from the pattern to knit a cuff to see how much yarn it’ll take. I want to use up as much as possible on these.
2010.04.11 Save 40 feet for the ribbing
2010.04.21 Back on track. NOTE to self: there’s a lifeline after heel eyelet 49. If I need to rip out to there again, do another patt repeat as usual, then do the increase row.
2010.04.23 On to the ribbing! Trying TechKnitter’s slipping technique / Cat Bordhi’s hungry stitch at the end of each dpn.
2010.04.26 Bound off! I own a complete, hand-knit sock! Now to start all over again to make its mate.

Wednesday, October 28, 2009

Happy Halloween!

I carved two pumpkins again this year; Eric made "gourmet" pumpkin seeds. On with the photos! (All photos link back to my Flickr account, where you can find more pumpkin photos in this set)

NY Giants Pumpkin - Light

I knew from the beginning of the season that I wanted to make an NY Giants pumpkin for Eric's fam. I checked out all of the different logos they use but in the end thought a simply one would be best and most easily readable from their porch. Apparently the last time they had a NY pumpkin the Giants won the superbowl. If that happens again... well... I see a lot of Giants pumpkins in my future.


Eric took the seeds from that pumpkin, did some magic and came up with fancy pumpkin seeds. They definitely have cinnamon on them, probably oil, maybe a bit of sugar, and I'm not sure what else. They smelled delicious.

His pumpkin only took an afternoon to clean out and carve, even with scraping an outline in addition to the carving. I wanted something more complicated, something challenging, but also something nerdy and preferably kind of creepy or scary for mine. I'm not quite up to carving a Jack Sparrow or Starry Nights pumpkin yet (those are my goals), but still wanted to push my limits and get more in the Halloween spirit.

Then I saw it. My preciousss.

My Preciousss

I'm not a huge Lord of the Rings fan--it took me forever to get through the books and even after reading them I had some trouble following the movies--but I still think it's an amazing literary piece and movie and have a lot of respect for them (Tolkien created how many languages for those books??). Gollum, a corrupted and decrepit hobbit, was exactly what I was looking for. It's a free pattern I found it on The Pumpkin Wizard site and took hours to carve. At one point, I had a spent a lot of time on this without seeing results and was ready to give up. Boy am I glad I stuck with it.

My Smeagol and Me

Happy Halloween, indeed.

Sunday, August 2, 2009

Origami- Contest and Mini Photo Album

Contest
Craft: Origami
Deadline: when the 1500th member joins (they're at about 1350 now)
Prizes include features on dA, dA subscriptions (for premium membership), deviant dollars, and a cell charm
For ALL details (requirements, prizes, etc.) CLICK HERE

To quickly summarize...
  • The theme is Origami, but "You can be as creative as you like to incorporate this theme."
  • You need to be a member of Artisan Craft (how to join), which also means you need to be a member of dA (membership form). Both are completely free to join and don't spam your email.
  • You can submit up to 3 entries.
  • You can use a tutorial so long as you reference it in the deviation description.
  • They're taking experience into account so if you've never done origami before, don't worry--you're not exactly going up against people who have been doing this for years.


My Entry
I found this tutorial for a mini origami photo album shortly before I read about this contest. As soon as I saw it, I knew I had to make it. It was just too good to pass up.

I hadn't done origami in years and even then I was only doing simple stuff and following directions exactly, but I was so excited for this (and rushed since the deadline is "open") that I quickly made a prototype with regular, white paper, dug up an origami kit from years ago, picked out the four designs that least clashed, and came up with an album of my own--all within an hour or two!
Ok so the colors/designs kind of clash, but it's the best I got right now.
Not long after putting this together, I kidnapped the boyfriend for a quick photo shoot. He's been working out, eating right, and just generally losing weight (you can check on his progress here /shameless, un-asked for promotion) which is probably why he was surprisingly quick to agree to a shoot. Doesn't look like he minded...

I cropped and desaturated them a bit, printed them out on nice photo paper, and put them in this order in the album, starting with the red frame and ending with the blue. It made quite a nice no-reason gift for him and now lives on his nightstand. My only regret was that I didn't get a picture of the photos in the frames, but I was too excited to give it to him to wait. It'd probably be a good Photoshop exercise to put them in digitally, but I'll save that for another day.

I'm not "in it to win it"; the contest theme coincided with plans I had already made and the deadline--especially the vagueness of it--gave me the motivation I needed to get it done within a reasonable time period. I know there's much more complicated things even a beginner can do but this is what I wanted to do and the results--though by no means perfect or professional--are quite satisfactory for the circumstances.

If/when I do this again, I'd like better coordinating paper and maybe try to push the corners of the frame back a bit so more of the photo is exposed and the paper doesn't meet at the middle of each side (more like a traditional photo album I guess). Some day. As usual there's so much to do and so little time.

Sunday, April 5, 2009

Back on Task

I started making arm warmer for a friend. I already made a green and purple entrelac scarf for her (ravelry) and had some yarn left over so I thought I'd make arm warmers out of it. This was the second of three entrelac scarves I completed in a row, so I've been pretty entrelacked out lately. I thought a simple stripe pattern loosely based on Knitty's Voodoo would be cool and quick. It was neither.

First, the colors still bother me a bit (they don't even photograph right--all these photos were adjusted to try to get the real life colors). The purple's a bit too blue and the green just doesn't have enough pop to match what I saw in my head (of course in the store it looked perfect ...just like clothes shopping!).

Then there's the fit. That's my left arm modeling the warmer. My friends arm, however, isn't long and lanky. This comes within an inch or so of her elbow (a good place for the glove) meaning they'll be about 8 stripes total. I pictured a lot more. I already ripped it out once to make each stripe two rounds shorter.

Speaking of color-changing in the round...
I got mixed results. The picture pretty much says it all, but allow me to add that this is no reflection on the TECHknitting article I used to learn how to make traveling jogless stripes [for future reference: while looking for the link for this article, I found this one which looks like it would have been a better idea for this project to eliminate the jogs around the purl valleys]. My favorite part: all joins are back joins so I don't have to weave ends in after (Russian joins, while lovely, are also not in my near future after using them exclusively in all three aforementiong entrelac scarves. Yes, I am crazy, why do you ask?).

So as I said, I ripped it out once after a couple stripes, started again and got this far, and then didn't touch it for weeks. I'm trying to be as monogamus as possible to reduce clutter, so this means I didn't knit for weeks. Completely unacceptable. It's now tucked away in a drawer and I have a new arm warmer on the needles. Let's hope this one gets completed (as well as its mate, of course!).

Sunday, November 16, 2008

Intarsia Wins Seed Stitch Match

Lesson learned: the 'purl bump' is actually created from the st in the previous row, not the st currently being purled. It's the top of the loop of that st.

This makes it physically impossible to introduce a new color with a purl bump of that color. When knitting in a new color, on the other hand, the top of the loop of the old color st lands on the WS of the fabric, giving the appearance that the new color really does start there.

So my red seed st heart on black St st background is impossible to knit in the way I planned it. I don't think altering the placement of the 'seeds' will be a good work around for this--already on both sides of the heart are many places where the first/last red st are knit... which would make them purls if I altered the seeding and then I'd be in the same predicament.

I think it may be plausible to introduce the red in the row below and then purl with it to get a red bump, but I'm not 100% sure that will work out the way I picture it.

Either way, I've decided to knit the entire chart in St st. This wasn't supposed to be a very challenging project, just a way of getting familiar with the very basics of intarsia.

Lauren v. Intarsia: Round 1 - Seed St

I want to make a pair of arm warmers for a friend. She'd like cables on a contrasting background, i.e., via intarsia.

I've never done any sort of stranded knitting before, merely horizontal stripes. The latter nearly drove me crazy by the end of a 7" x 9" illusion-knit block so I couldn't imagine that dealing with multiple colors (and tangling strands) would be much easier. Of course, I was the one who suggested one-colored cables on a different-colored background, knowing full-well I'd need intarsia (moreover, at that time I'd planned on doing them up in the round; I've since given up on that idea and am most grateful that the pattern is already written for back-and-forth knitting).

I like pushing my limits, but I'm not one to begin on the hardest difficulty setting without first testing out the skills required--especially when someone else is the intended recipient so I'm striving for perfection more than normal. After the initial sighting, I've seen a few "monthly necessities" bags and decided to make one of those with a simple heart pattern on the front in a CC.

Shortly after beginning it entirely in stockinette, I frogged it and made 3 rows if seed st as the base to keep it from curling as much. From there, I thought, "it'd also seem prudent to knit the closing flap in seed st to stabalize that as well," which took me down a slippery slope to, "so long as I have that much seed st on the back, why not include some in the front, too? I'll do the heart in seed st!"

So now I'm faced with making my first-ever intarsia st as a purl on a knit background. My usual resources fails me ...well, they don't fail me completely (new mantra: "old over new") but they don't hold my hand through non-stockinette intarsia. As much as I hate to admit it, that's kind of what I need right now.

The best I've found from Google so far is this post on garter intarsia. It doesn't have anything about purls, of course, but it was encouraging to see the process someone else used to get creative with this method. She (He?) had to deal with strands being on opposite sides, which is kind of close to my predicament.

I've already tried a few times and either get the MC mixed with the CC or no purl bump, but I'm still determined to do this. Once I get that purl bump cleanly on the RS (and get it to stay there unlike that time it mysteriously disappeared after switching back to MC) I'm not going to be too picky about whether the strands were properly linked. It's one st and immediately going back to MC after that so any hole really wouldn't be that noticeable. In fact, it may even be remedied while weaving in the ends.

For now, I've frogged and ranted enough for one night. Tomorrow's another day.

Tuesday, November 4, 2008

Elbac is officially frogged

I took a photo before ripping it out last night:

It just wasn't fun for me. I was cabling too tightly making it difficult to knit, and I kept losing my place.

Don't get me wrong--I think reversible cables are awesome and I want to use them whenever the wrong side might show, but after learning the magic behind the trick this scarf wasn't as interesting.

I'll come back to reversible cables another day with a new project and nicer yarn.

Friday, October 31, 2008

Happy Halloween!

It's been years since I carved a pumpkin but this year I was so excited for this that I carved two.

Both patterns are from www.pumpkinglow.com. I highly recommend this site--excellent patterns (and they're free!). The only downside is that they're specifically not themed for Halloween.

Now on with the goods!

My panther pumpkin:

A dragon pumpkin I bought and carved on a whim for Eric:
Technically this pumpkin is supposed to be a lot brighter, but once he saw it like this he wouldn't let me punch out the rest of the pieces. I'll admit the whole outline this is pretty cool (and it saved me the trouble of poking out the more complicated pieces around the face).


And photos of them not lit:


Both carvings include scraping the skin (my choice, the patterns weren't actually designed that way). It was my first year scraping and I scraped too much. Everything on Eric's pumpkin that isn't an outline is actually scraped, it's just so thin that it looks about as bright as if I'd just cut through. Doesn't make much of a difference for his anyway since the parts that were supposed to be brighter stayed in the pumpkin for an outline effect anyway.

My panther pumpkin shows off the shading a bit better, but this pumpkin was older and drier after sitting out on the porch for a couple weeks. It was much harder to scrape than the other pumpkin so I ended up poking holes in it while trying to scrape.

Live 'n' learn.

I still love my pumpkins anyway.
...so much so, I was even allowed my picture to be taken while carving one:


Have a safe & happy Halloween!

Saturday, October 4, 2008

Status Check

Another post without photos... =/

Cherie Amour: still on the waist, but I'm pretty sure this is the last frog I'm going to do. The 2x2 rib with cables on every other rib looked very wide/bulky, the 1x1 rib looked very dense compared to the lace work, so I'm trying a 1x1 rib with eyelets every 4th row. I swatched a couple such eyelets, but none came out straight. k2tog was almost straight, but still with a bit of a wave; ssk made it look like more of a twist almost. I'm going with the latter because I can call it a design element instead of something that almost worked. It will create horizontal bands, but I think it'll be ok.

So I ripped out the waist and spent the week dekinking the yarn. The last batch is almost dry and it's now that I realize I should have wound them in smaller hanks so they dry faster. Another live & learn moment I guess.

Since I keep frogging and dekinking, I also decided that I'll soak the rest of the yarn before use. I don't notice a difference between fresh-from-the-hank and post-soak, but for all I know there's a big one. Just to be on the safe side, I also wet-blocked what I made so far and it does look nicer and more even already.

Old art: While the soaking and drying was going on, I went on a cleaning spree and found a lot of old art stuff. Most I don't mind getting rid of, but I'm really proud of one of the drawings I found (and in charcoal at that!), and two of the finds are needlepoint--including what I think is my very first one! More details on those after I photograph and post them.

Dom's arm warmers: Dom wants arm warmers--and I'm making them for her! Much more about this later, but for now it will suffice to say that this makes me ridiculously... excited, happy, manic, bouncy, and just overall hyper.

Misc. ideas:
  • Elbac: I think I'm just going to rip out what I did and not look back. It's fine, it looks like the photos, but I'm not enjoying it. I still love the idea of reversible cables, but now that I (mostly) understand the technique, I'm not as excited about this project as I once was. Maybe with nicer yarn and a recipient in mind it'll be more enticing.
  • A "monthly necessities" bag: the idea for one never crossed my mind until I saw "My Dear Aunt Flo's Felted Pouch" on Ravelry by Christy Tchaparian (non-Ravelrers can find her blog here and her pattern available on Etsy here) and then I promptly decided I must make one. I usually use a purse's inner pocket for such items but the one in my current purse is too small so I end up digging through them to get my wallet, chapstick, flash drive, etc. Plus my coworkers are mostly male and don't need to be exposed to such foreign items, lol. I'm thinking it'll be knit, black stockinette st background with a red seed st heart (first intarsia project?) inspired by another idea I had for...
  • A larger bag--black background, red foreground illusion heart bag ...because I'm still fascinated by illusion knitting. Will be lined.
  • To use up stash, a black 1x1 rib scarf with 3 pink stripes on either side
  • Tetris scarf (or something Tetris)
  • Something SMB3. I wanted to do a set of hats with a different character on each (including Mario in Kuribo's shoe!) but I'm having second thoughts about that.
  • Chokers
  • Plus more WUA sections and such
Oh! I forgot I took some fire photos recently (my bf's fam has a fire pit in their backyard). Maybe I'll go through those and see if there's any I particulary like to post here...

In the meantime, back to productiveness!

Sunday, August 10, 2008

Cherie Amour: First major frogging

True to my intentions, I did work up a lot of Cherie Amour while at the beach (even finished the first ball of yarn!), but I'm caught up in the Harry Potter's again I'm having some doubts so once I got back, I left it in the bag, and didn't break it out again until finishing the 4th, 5th, and 6th books until a week later for an assessment and photos.

Current progress:


[Those purple squiggles are lifelines]
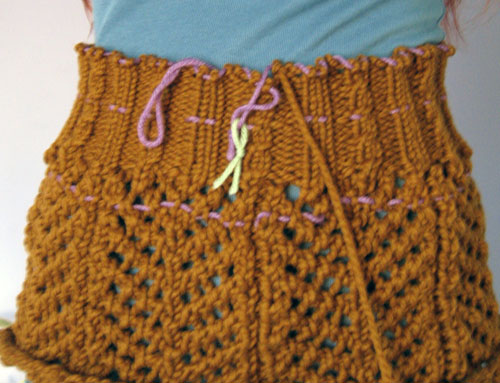
I'm not sure why the photo's so pixelated (it doesn't look that way elsewhere on my computer... maybe because of Blogger's automatic resizing?). A close up of the waist section:


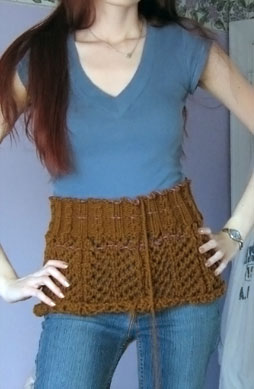
After giving it a week's rest, I'm still not satisfied. I want the lace part longer so the ribbing doesn't end up the same length. As for the ribbing itself... well... as much as I love the cables, each rib is really wide and bulky and unflattering (and that's on size 8 needles). I'm going to try a 1x1 rib instead.

Next up: frog, de-kink the yarn, add a couple more pattern repeats to the lace, then 1x1 rib for the waist section. Then I still need to look into the rest of the sweater, too. I know I don't like the shape of the sleeves as written--I want at least straight sleeves, if not belled--and I'm concerned that 6" of positive ease around the bust is going to be huge. We shall see, we shall see.

Sunday, July 27, 2008

Meet ...swatch?

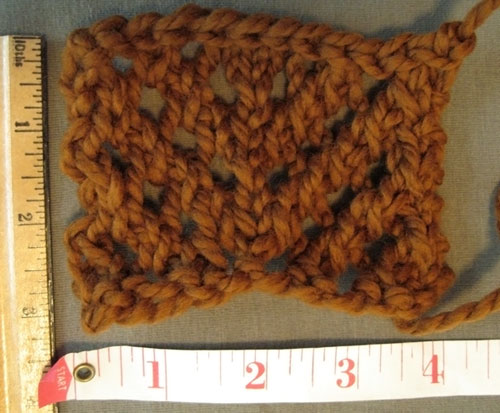
Ok, so that one doesn't really work. But you can still meet my Cherie Amour swatch:


Ain't it purty?

Photo was taken before blocking. After blocking, it was still about the same size AND I was able to get rid of most of the wavyness at the bottom (it might be a cool design feature for some, but combined with the lace it would be a bit too girly for my tastes).

In the interest of full disclosure, this was knit back and forth, not in the round. I was going to make another, bigger swatch knitting in the round and this was going to be my lets-see-just-how-much-damage-I-can-inflict-without-felting swatch. Then I was so excited that I met gauge and figured it really can't be that much different and am I really going to get more needles? No. No I'm not. Let's be honest--I want to knit the sweater, not tons of swatches until I find the right needles and everything. If anything, my knit gauge is tighter than purl, so it'll come out a bit smaller. I don't see that as a bad thing--I just barely fit the XS as it is.

So I cast on.

So far it looks awesome, fits fine (yes, I tried it on when it was 2" long), and is going by so fast I balled another skein already because I'm almost done with the first one.

Coming up: 3 days of work, followed by a few days at the beach. I might get some knitting done in the mornings before work, but those beach days... I'm not a sand & surf kinda gal: the only thing I like less than seaweed and jellyfish wrapping around my legs is sticky, wet sand covering every part of my body. So while half of my boyfriend's family is on the sand and playing in the ocean for a week, I'll stay near the house with the other landlubbers. There will be much knitting those days while I sit my pale butt down in the shade of an umbrella and over-sized tee in a backyard that overlooks the ocean. Minimal ickyness exposure; maximum needle time.


EDIT 7.27.08 11.24pm
Completely forgot: I told you that I blocked the swatch already, what I didn't tell you was that it was a wet block and it stunk! I had no idea wet sheep smelled so bad. I was worried there was something in the water (no special wool stuff for now, I just wet it in plain ol' water so it would block). Now that it's thoroughly dry it's fine, but I really wasn't expecting it to be that potent. (Actually, I don't know what I was expecting, nor what inspired me to stick my nose in it in the first place...)

Thursday, July 24, 2008

Meet Hank

And Hank, and Hank, and...

(I'm sorry. I'm hopelessly attracted to bad puns.)

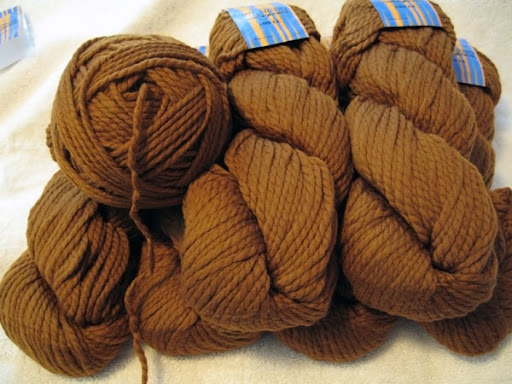
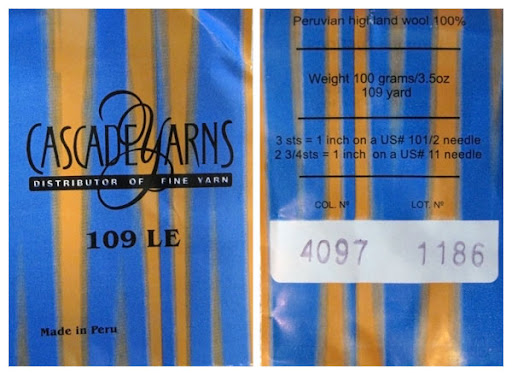
This past weekend, I bought 7 hanks of Cascade LE for Cherie Amour. I couldn't stop touching it (Hank is pretty irresistible like that), so I balled one hank shortly after walking out of the store:


A swatch of it is already knit up and drying.

Sunday, July 20, 2008

Yarn: check!

My yarn came in! And due to work I had to wait until the weekend to get it. [Side note: Starting tomorrow, my hours change so that I'll be working the late shift instead of mid shift--ideally to work less overtime. There's a small chance, if I get up early enough, that I can go yarn shopping before work during the week now. Assuming, of course, I can find my way there by myself, make my decisions quickly, and find my way to work from there (and it's not on the way at all). ...but I do have the motivation, lol.]

Work aside, I have my first "real" yarn! Cascade LE 109 (I think it's a super bulky) in a golden brown that should go well with my plethora of jewel-tone t-shirts (and blacks, and whites, and even the couple pastels I have).

It came out to a lot more than I was expecting--like, $40 more. When I checked out the Cascade price tag last time I was there, it was for the worsted 220, not the weight I bought which is more expensive. Plus the needles were a lot more than expected as well ...but they're Addi Turbos which, according to the Ravelry boards, seem to be pretty high quality so I guess they're worth it. I was a bit confused when she first told me the price, but I'm not going to guilt myself over this. Especially now that I'm working the late shift because I get a differential for that. The total amount spent at the LYS came in just under the extra bucks I'll get in my first paycheck for this shift, so it's not like I lost money yet, per se (last work reference in the post, promise).

It's way too hot and sticky to break out the camera, set up one of my make-shift backdrops, take photos, edit them, etc. I can't even stay on the comp long because that generates additional heat. So I'll post pix another time. I do finally grasp the concept of how yarn is seasonal: besides balling one hank, I haven't had much of an urge to fondle the yarn. It's just too gross out to play with heavy wool.

Actually, now that I think of it, turning off the comp sounds like an excellent idea. I'm off to grab a big glass of ice-cold water before going to sleep on top of the covers. G'night.

Thursday, June 26, 2008

Stockinette v. Illusion

It looks like my star illusion WUA section is not going to meet the WUA dimension requirements: 9.5" across, 4" @ 2/3 of the way through (it's supposed to be 9" x 7"). I doubt they'll mind an extra half inch and I can make up the shortness by adding a crochet border on those two sides, but it's still a bit of a disappointment that I didn't get it right the first time.

Lesson learned: all-stockinette gauge swatches should not be used as a measurement for illusion knits.

Tuesday, June 17, 2008

Illusion Star Chart - Completed!

I'm so excited about this illusion square that I scrambled to finish the chart before leaving for work yesterday morning. It's the first chart I've ever made and the first anything I'm doing with illusion knitting, but for some reason I'm really confident it's going to work.

After studying a couple patterns (the alien scarf in Stitch 'n Bitch and another one on dA), it just clicked--colors alternate every two rows, the second row of each color contains the RS purls, and the actually number of RS purl rows is 1/4 the number of total rows so the image has to be on a 1/4 vertical scale. That's it!

Which makes me wonder if I could write up a tutorial for it... hmm...


The only thing I am scared of is that the total number of sts and rows will be off. The results of the stockinette 7" x 9" gauge "swatch" I made to prep for this really surprised me. It was the first time since beginning to knit continental that I had entire rows of just knit or purl, not mixed. All my purl sts were loose enough that they're at risk of slipping off the metal needles; my knit sts were so tight that they took a bit of effort to slide around the metal needles. Weird. It makes sense, I guess, since purling continental is easier than the knit for me (...which itself it also a bit strange).

Whatever happens, it'll be a good experience.

Monday, June 16, 2008

June 2008 Goals

A bit of a delayed start, but this month I want to...
  • At least get the yarn & needles I'll need for Cherie Amour. I'd love to actually cast on, but that's a bit difficult without all the materials.
  • Knit up another WUA square. This time I really want to try illusion knitting, just a simple star pattern.
  • And if I get the chance, get some more work done on that snowflake/starching tutorial tutorial. Maybe I'll finish it before this year's Christmas =P
I already...
Knit two more WUA squares. One that's the same pattern as another I made (quick, easy, mindless knit). The other was essentially a 7" x 9" gauge swatch for the illusion square to come.

Goal Check: May 2008

The hold up has been the photos ...so I'll just skip those for now and add them later (eventually).

I only made two of the three WUA squares intended, but got so much more done:
  • 2 WUA squares
  • finished (wove in ends) a pair of wrist warmers I knit over a year ago (finally!)
  • took photos of 3 different projects that have been waiting to be documented for quite some time (the wrist warmers + 2 entrelac scarves)
  • took the photos needed for a starching tutorial (another "finally!")
  • started planning more projects
So overall, I did more work than just 3 WUA squares =)

Sunday, May 18, 2008

Fourth Try's a Charm

The first square for this month's project--a green square completed in seed st--I knew I wanted to make for a while. It just fit.

For the second square, I'm trying to use up some pink yarn and it's not going far. I've tried three different st patts so far. I'm choosing them out of a book (The Knitting Directory, Alison Jenkins) and they're coming out a lot more ...vertically squished than the photos in there. A purl st chevron, moss st triangles (purl triangles + knit triangles)... I think I'm just going to settle on the caterpillar st and keep going once I frog it and cast on enough sts (oops).

Blah.. knitter's block I suppose. At least all this frogging is giving me practice at the double cast on. I still don't like how you can't tell how long the tail is going to be beforehand, but it's so much more fun to cast on that way than knitting them on. ...a nice change, we'll say, to use fingers instead of needles.

Knitting continentally isn't getting any easier (thank you, learning curve). The seed st was awesome and easy; surprisingly knitting and especially purling are more difficult when not alternating st. Weird.

But my commercial break from The Incredibles is over. Back to the needles for me.

Wednesday, May 14, 2008

May 2008 Project

So I can better develop this newly learned skill, I decided that my project for this month will be to knit 3 sections for WUA using using the continental method. Stash busting, charity, and practice all in one shot.